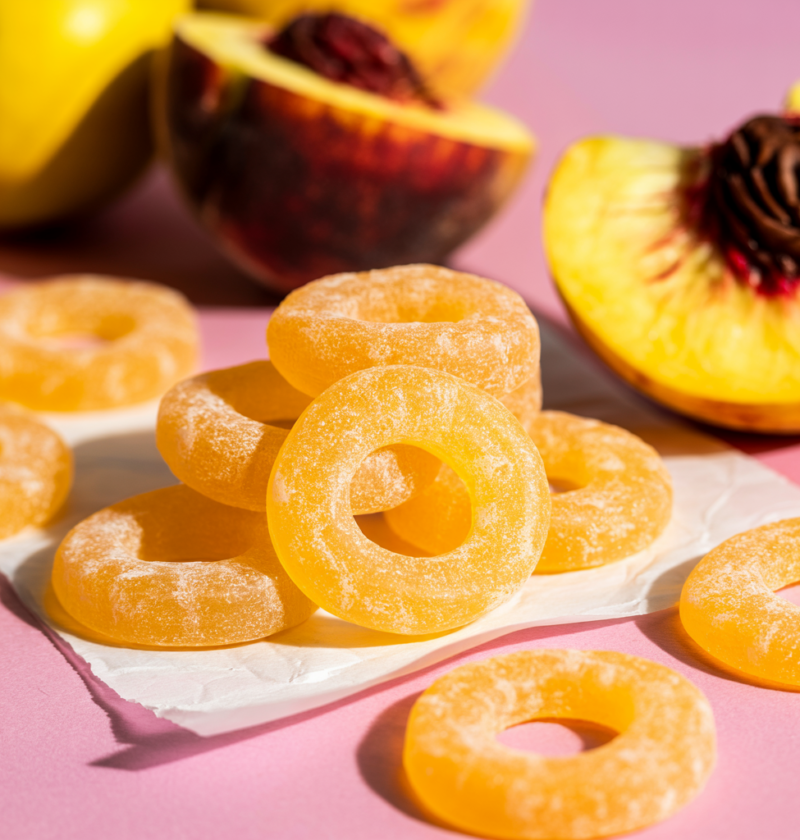
These Homemade Peach Ring Gummies are nostalgic, fun, and surprisingly simple to make at home. Soft, flavor-packed, and vibrantly peachy, they’re a delightful treat that both kids and adults will love. With just a few ingredients—real peach puree, gelatin, a bit of sugar, and lemon—they’re customizable, gluten-free, and free of artificial flavors or colors.
Why You’ll Love This Recipe
- Made from real fruit puree for authentic flavor
- Quick prep—no simmering or canning
- Fun shapes that bring out your inner child
- Perfect for gifting, lunchboxes, or sweet snacking
Ingredients
- 1 cup peach puree (about 2 large ripe peaches, peeled & blended)
- 2 tablespoons lemon juice
- 3 tablespoons granulated sugar (adjust to taste)
- 3–4 envelopes unflavored gelatin (approx. 21–28g total)
- Optional: extra sugar or citric acid for coating
Kitchen Equipment Needed
- Blender or food processor
- Saucepan or microwave-safe bowl
- Whisk or spoon
- Peach-ring gummy mold or silicone candy molds
- Dropper or small measuring cup
- Airtight container for storage
Prep & Make Time
- Prep time: 10 minutes
- Chill time: ~2 hours
- Total time: 2 hours 15 minutes
Step‑by‑Step Instructions
1. Prepare Peach Puree
- Peel peaches and remove pits.
- Blend peaches until smooth. If needed, add a splash of water to help blending.
- Measure out 1 cup of puree.
2. Bloom the Gelatin
- In a small bowl, combine peach puree, lemon juice, and sugar. Stir to mix.
- Sprinkle the gelatin evenly over the puree mixture. Let it sit for about 5 minutes. This is called “blooming” — it helps the gelatin dissolve smoothly.
3. Gently Warm the Mixture
- Heat the bloomed mixture over low heat (stovetop) or in 30-second intervals in the microwave, stirring gently.
- Warm just until the gelatin fully dissolves—keep it below 120°F to preserve the gelatin’s ability to set
- Do not let it boil.
4. Fill the Molds
- Once the gelatin is dissolved, quickly pour or pipe the mixture into your peach ring molds. Work fast, as it begins setting when it cools.
5. Chill to Set
- Transfer molds to the fridge for at least 2 hours, or until gummies are firm to the touch.
6. Unmold & Optional Coating
- Carefully remove gummies from molds.
- If desired, toss them lightly in sugar or citric acid for a candy-shop look and tang.
Tips for Success
- Keep the mixture below simmering temperature—heating above 120°F deactivates gelatin .
- Evenly sprinkle gelatin so there are no lumps.
- For firmer gummies, use 4 envelopes of gelatin. For chewier texture, use 3.
- Customize flavor by mixing peach with other fruit purees—mango, strawberry, or raspberry work beautifully.
- Add a drop of food-safe color for deeper peach hues (optional).
Variations & Substitutions
- Vegan alternative: Use agar-agar (test for setting ratio, as it’s stronger than gelatin).
- Sugar-free: Substitute sugar with honey or agave syrup, but adjust quantities to taste.
- Extra tart: Mix in ¼ teaspoon citric acid into the puree before blooming for tanginess.
- Mixed fruit rings: Layer different purees in molds (peach/strawberry) for colorful combos.
Storage & Serving
- Store in an airtight container in the fridge for up to 7 days.
- To prevent sticking, layer parchment paper between gummy stacks.
- Bring to room temperature before serving—they soften as they warm.
Presentation Ideas
- Use peach-themed molds for aesthetics
- Serve on a board with powdered sugar-dusted gummies
- Package in small glass jars or favor bags for events
Final Thoughts
These Homemade Peach Ring Gummies are charming, delicious, and entirely customizable. They capture the juicy sweetness of summer peaches in a portable, fun form—perfect for gifting, snacks, or nostalgic moments.